

Note: According to Facebook in this article, “Only Pages with 2,000 or more likes can create custom Page tabs”. This limitation applies to the custom tab used in this tutorial. This means that you can only install the Static HTML: iframe tabs if your page has 2,000 likes or more.
Steps to insert your Google tour into your Facebook page.
- Log into your Facebook profile that manages your business’ Facebook page
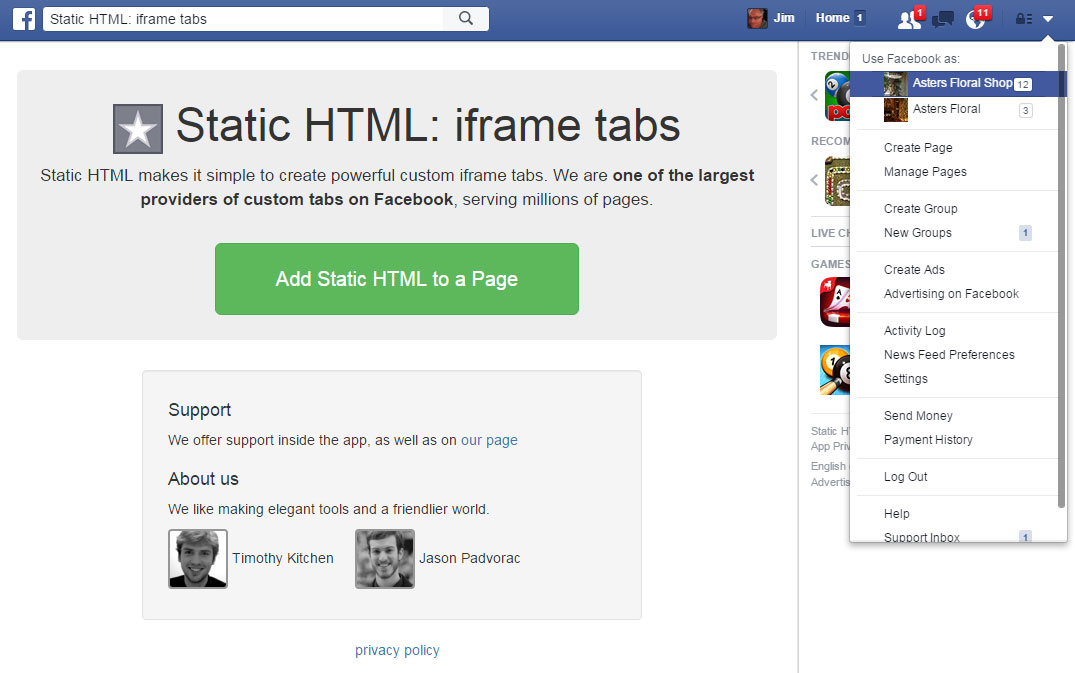
- Visit Static HTML: iframe tabs on Facebook
- Press the green button to add the app to your page.
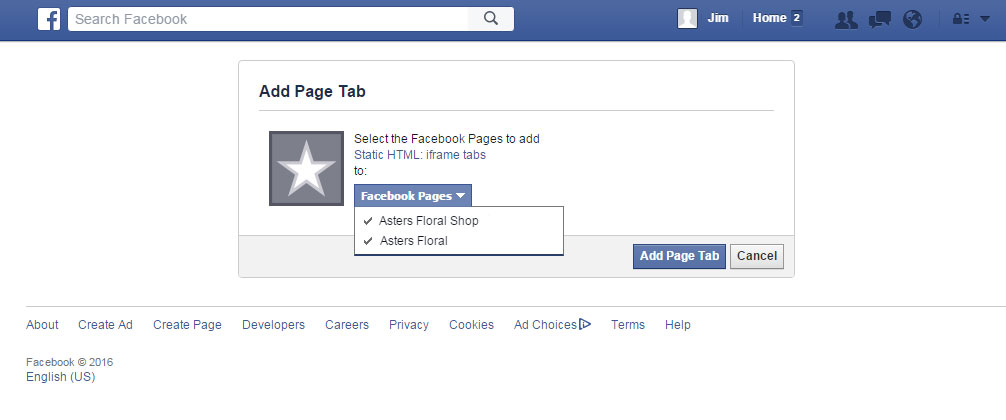
- Click on the drop-down menu for your Facebook pages and check off the pages before pressing the blue ‘Add Page Tab’.
- Use Facebook as your business’ page. (Press the top-right arrow for the drop-down menu and select your page account)
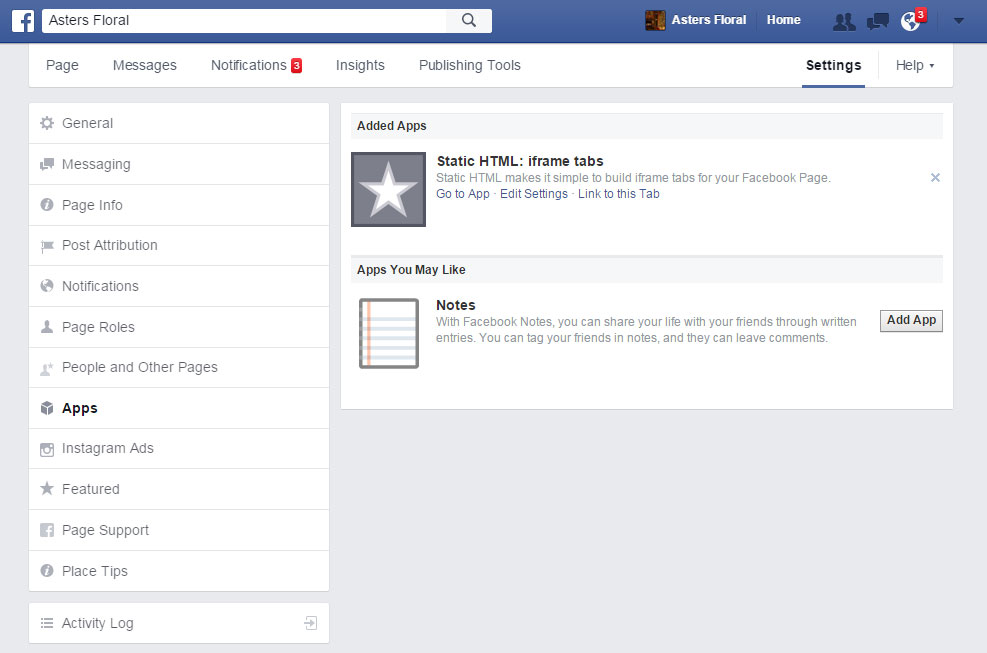
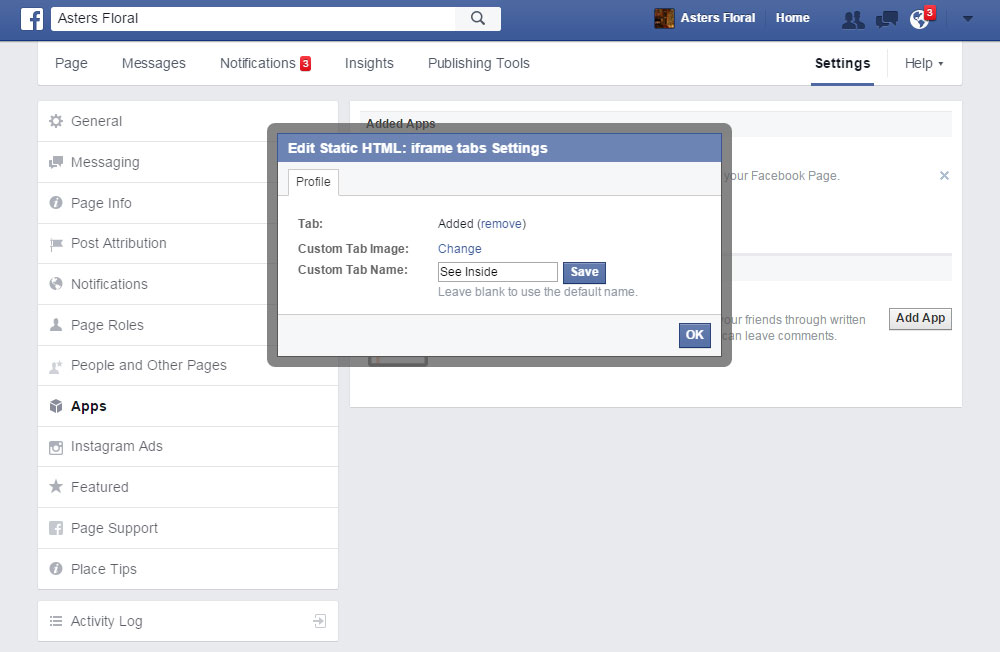
- To rename the new tab (labeled ‘Welcome’ next to the star icon), go to the Settings page and select ‘Apps’ in the left column.
- Press ‘Edit Settings’ under the Added App, Static HTML: iframes tabs
- Rename the Custom Tab Name and Save. (We changed ‘Welcome’ to ‘See Inside’)
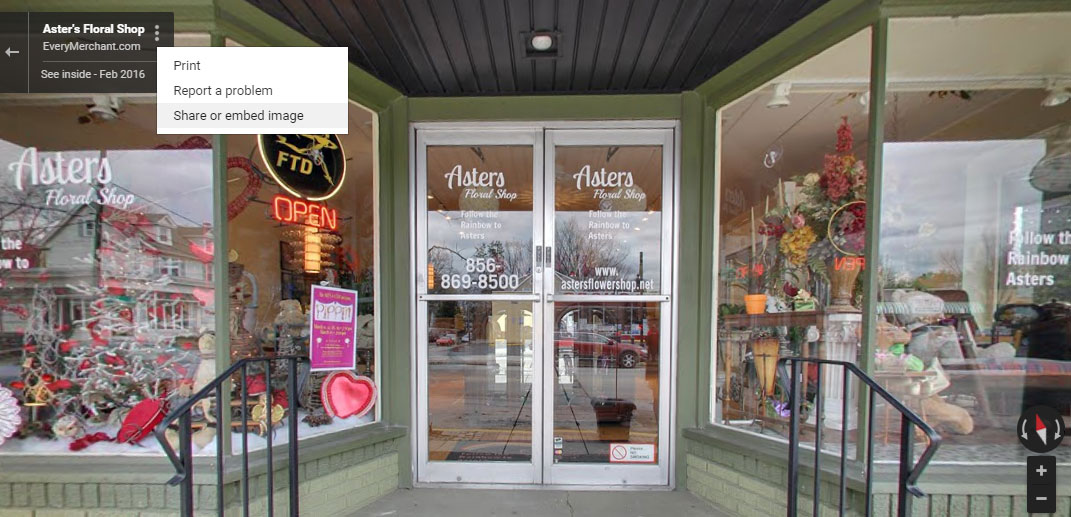
- Go to your Google tour and press the 3 dots at the top-left corner for the drop-down menu.
- Select ‘Share or embed image’
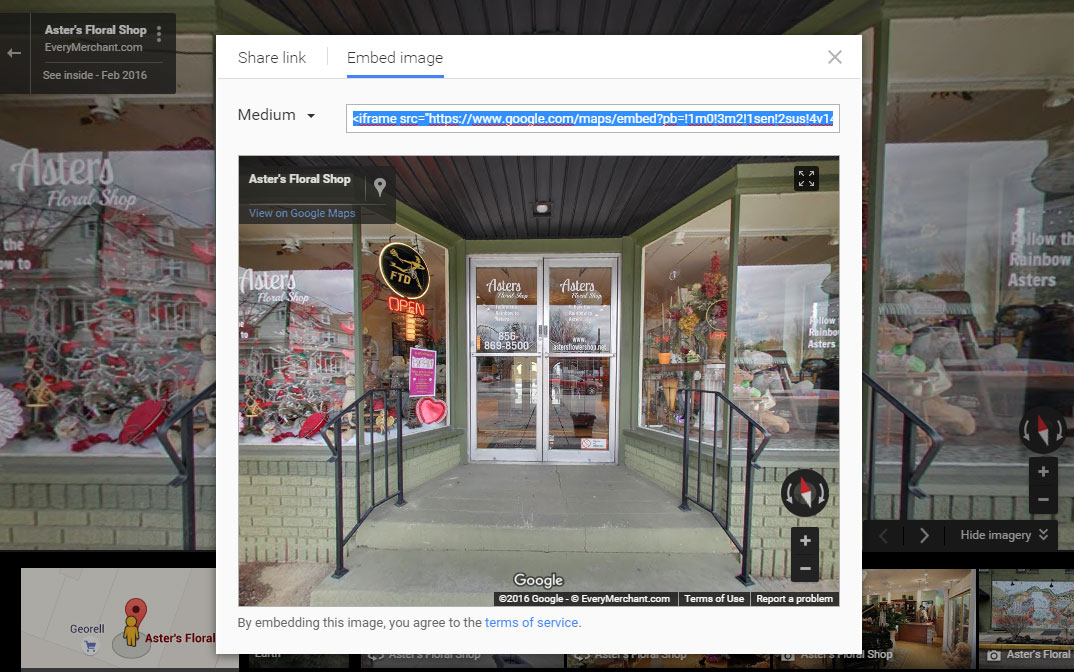
- In the pop-up window, select the ‘Embed image’ tab.
- Copy and paste the html iframe code.
- Return to your Facebook page and click on the Static HTML app we re-labeled it ‘See Inside’ in the left column.
- Upon entering the app, press the green ‘Edit tab ->’ button to enter the app’s dashboard.
- In the index.html box, delete the default text and paste the Google tour’s html iframe code
- Press the ‘Save & Publish’ next to the green preview button
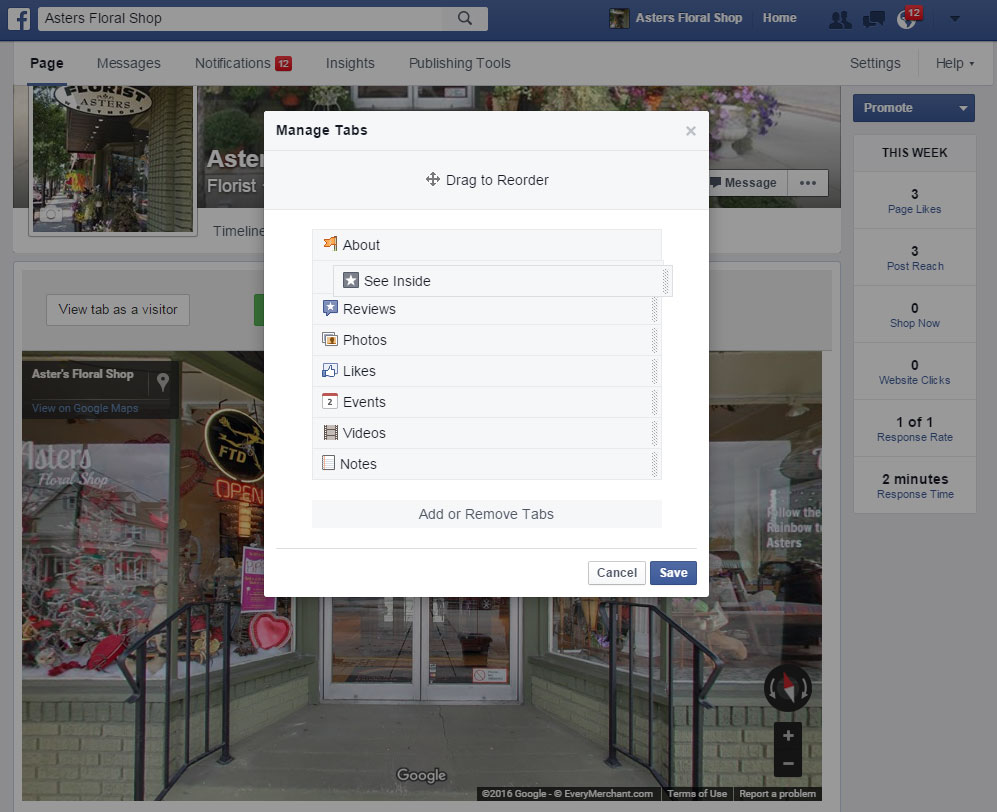
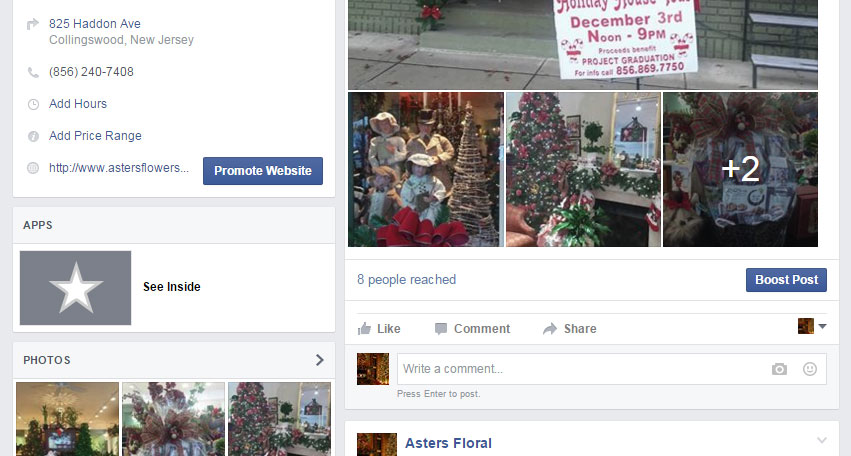
- Return to the front of your Facebook page and select ‘Manage Tabs’
- Drag the ‘See Inside’ tab further up to make it visible on your page and Save.
Steps 1-3
-
- Log into your Facebook profile that manages your business’ Facebook page
- Visit Static HTML: iframe tabs on Facebook
- Press the green button to add the app to your page.
Step 4
-
-
-
- Click on the drop-down menu for your Facebook pages and check off the pages before pressing the blue ‘Add Page Tab’.
-
-
Steps 5-7
-
-
-
- Use Facebook as your business’ page. (Press the top-right arrow for the drop-down menu and select your page account)
- To rename the new tab (labeled ‘Welcome’ next to the star icon), go to the Settings page and select ‘Apps’ in the left column.
- Press ‘Edit Settings’ under the Added App, Static HTML: iframes tabs
-
-
Step 8
-
-
-
- Rename the Custom Tab Name and Save. (We changed ‘Welcome’ to ‘See Inside’)
-
-
Steps 9-10
-
-
-
- Go to your Google tour and press the 3 dots at the top-left corner for the drop-down menu.
- Select ‘Share or embed image’
-
-
Steps 11-12
-
-
-
- In the pop-up window, select the ‘Embed image’ tab.
- Copy and paste the html iframe code.
-
-
Steps 13-14
-
-
-
- Return to your Facebook page and click on the Static HTML app we re-labeled it ‘See Inside’ in the left column.
- Upon entering the app, press the green ‘Edit tab ->’ button to enter the app’s dashboard.
-
-
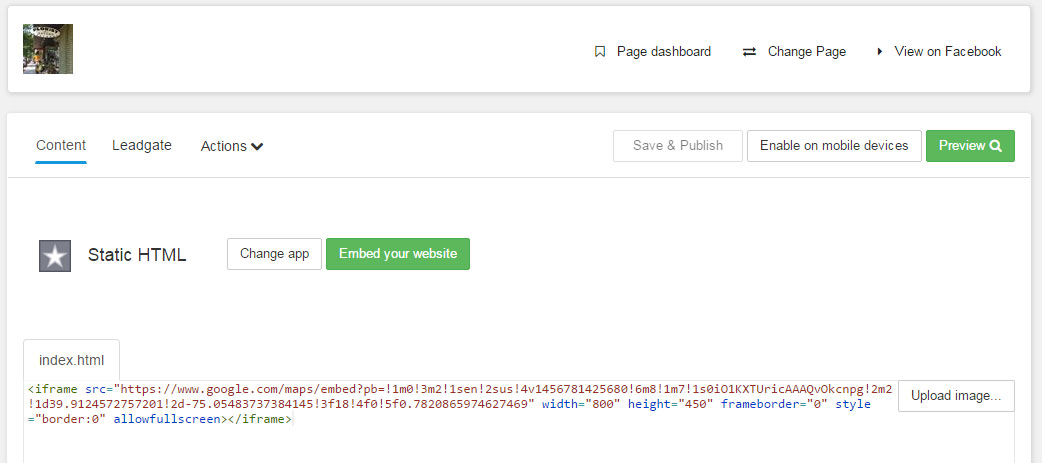
Steps 15-16
-
-
-
- In the index.html box, delete the default text and paste the Google tour’s html iframe code
- Press the ‘Save & Publish’ next to the green preview button
-
-
Step 17
-
-
-
- Return to the front of your Facebook page and select ‘Manage Tabs’
-
-
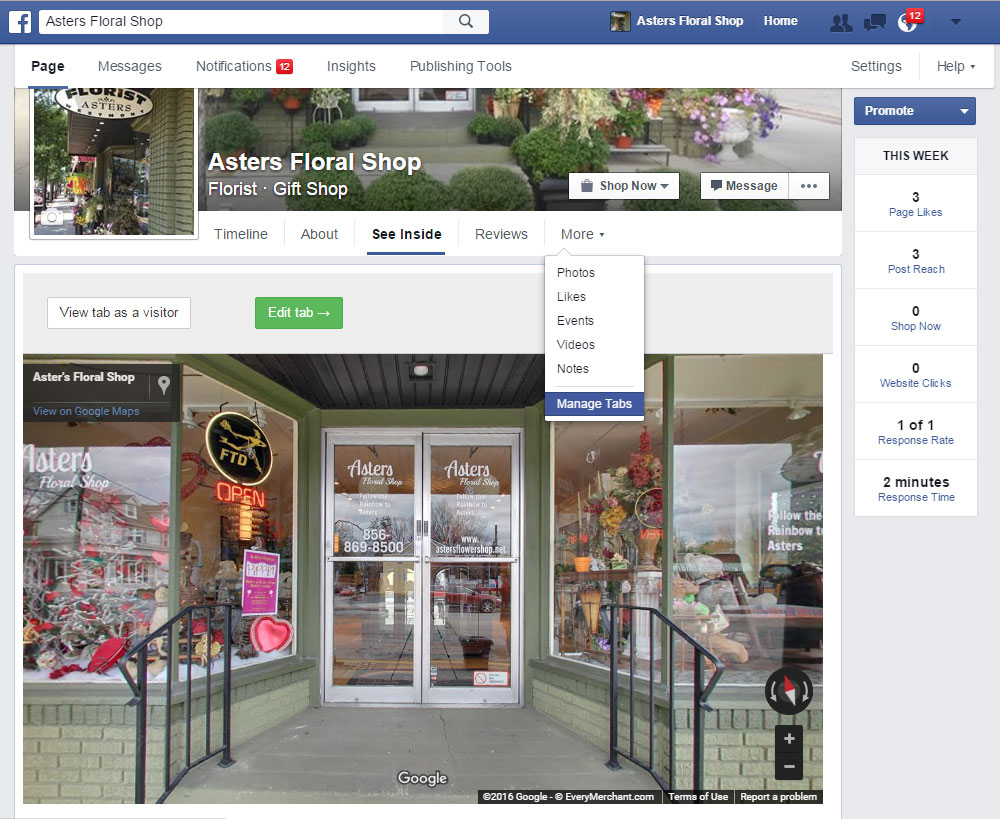
Step 18
-
-
-
- Drag the ‘See Inside’ tab further up to make it visible on your page and Save.
-
-